Bugsmirror MASST Integration Documentation
1. MASSTCLI
Masst CLI is a cross-platform CLI tool for integrating security into your app binaries. Please ensure you follow the steps corresponding to your operating system for smooth execution.
Pre-Requisites
For iOS (Shield Integration): If you are opting for Shield on iOS, please refer to the following documentation for the required pre-submission changes Click Here
For Android (Shield Integration): If you are opting for Shield on Android, please make sure to update the required pre-submission changes:
Android ProGuard Configuration
ProGuard rules are defined in a file named proguard-rules.pro, typically located at android/app/proguard-rules.pro. This file is referenced from your app-level build.gradle (or build.gradle.kts) under the release build type.
If you do not have a proguard-rules.pro file, create one manually in the android/app/ directory and ensure it is linked in your build.gradle configuration.
Only once the proguard-rules.pro file has been identified or created, continue with the steps below.
For Flutter Apps (Android side):
-keep class io.flutter.embedding.** { *; }
-keep class androidx.fragment.app.Fragment { *; }
For React Native Apps (Android side):
-keep class com.facebook.react.** { *; }
-dontwarn com.facebook.react.**
1.1 macOS
Step 1: Install Dependencies
Ensure your system has all required dependencies installed for iOS and Android builds.Verify the following tools are available in your $PATH:
- Xcode & Command Line Tools — for iOS builds
- Android Studio / Command line tools — for Android builds
- Java JDK — if required by your Android build
Step 2: Choose the Integration Workflow
After selecting your application to apply for, you will reach the step where you choose how the files are processed.
Choose How to Provide Application Files
This choice is shown only when Defender is not selected.
When you select only testing tools and do not include Defender, you can choose one of the following workflows:
Portal Upload Workflow
Choose Upload to work entirely within the MASST Portal:
- Upload your APK or IPA directly in the portal
- Files are uploaded automatically
- After processing, the analysis report becomes available in the portal
CLI Workflow
Choose CLI for a command-line or automated workflow:
- The portal generates a
masst_config.bmfile - Download the CLI tool from the portal
- Use the configuration file as-is with MASSTCLI
Step 3: Download the MASSTCLI Tool
You can download and install MASSTCLI using either the MASST Portal or direct curl commands. Follow the method that best suits your workflow
Option A: Download Using curl (Recommended)
Downloading via curl fetches the binary directly via the terminal — no additional security permission steps are required.
Choose the download command corresponding to your system architecture (ARM64 or AMD64) before proceeding.
ARM64:
curl -L "https://storage.googleapis.com/masst-assets/Defender-Binary-Integrator/1.0.0/MacOS/MASSTCLI-v1.1.0-darwin-arm64.zip" -o masst_cli.zip
AMD64:
curl -L "https://storage.googleapis.com/masst-assets/Defender-Binary-Integrator/1.0.0/MacOS/MASSTCLI-v1.1.0-darwin-amd64.zip" -o masst_cli.zip
After downloading, unzip into a preferred folder (e.g., ~/MASSTCLI):
unzip masst_cli.zip
You can now proceed directly to running the tool.
Option B: Download from MASST Portal
Download directly from the MASST Portal UI by selecting:
- Platform: macOS
- Architecture: ARM64 or AMD64
Once downloaded, extract the ZIP file into a preferred folder (e.g., ~/MASSTCLI) and make the binary executable if required:
chmod +x MASSTCLI
Security Permission (macOS — Portal Downloads Only)
When the CLI is downloaded via the MASST Portal (browser download), follow the instructions below:
- Attempt to run the binary once:
./MASSTCLI - Go to System Settings → Privacy & Security
- Click Allow Anyway for MASSTCLI
- Re-run the command
This step is not required when downloading with curl.
Help Command (Reference) Before running the tool, you can view all supported commands and flags using:
./MASSTCLI --help
This command lists all required and optional parameters explained below.
Required Flags (iOS):
  -input           string   Path to the input file (.ipa or .xcarchive)
  -config          string   Path to the SDK configuration file (.bm) [Either -config or -threatlensApiKey is required]
  -threatlensApiKey     string   Path of the masst cli app key [Either -config or -threatlensApiKey is required]
  -identity        string   Signing identity for App Store submission

Required Flags (Android):
  -input           string   Path to the input file (.apk or .aab)
  -config          string   Path to the SDK configuration file (.bm) [Either -config or -threatlensApiKey is required]
  -threatlensApiKey     string   Path of the masst cli app key [Either -config or -threatlensApiKey is required]
  -keystore        string   Path to the Android keystore file
  -storePassword   string   Password for the keystore
  -alias           string   Alias for the signing key
  -keyPassword     string   Password for the alias key

Optional Flags:
  -apk             Generate APK from AAB (Android only)
  -dev             Build iOS simulator binary (iOS only)
  -v               Enable verbose logging
  -shieldLevel     Shield protection level (1, 2, or 3)
  -compression     Enable compression for android side
  -defender        Enable Bugsmirror Defender
  -runlock         Enable RunLock
  -apilock         Enable ApiLock
  -defenderTAB     Enable Bugsmirror Defender With Trust-API-Bind
  -codelock        Enable CodeLock
Step 4: Run the Tool
For iOS:
When integrating an iOS application using MASSTCLI, you must provide a valid Apple Distribution signing identity using the -identity flag.
To locate the correct signing identity installed on your system, run the following codesign command in your terminal:
security find-identity -v -p codesigning
Pass the selected identity exactly as shown when running the tool:
./MASSTCLI -input=MyApp.xcarchive -config=masst_config.bm -identity="Apple Distribution: My Company"
For Android:
./MASSTCLI -input=Test/test.aab -config=Test/masst_config.bm \
  -keystore=Test/key -storePassword=dfdf -alias=key0 -keyPassword=dfsdfs -apk
If you are using the integrator for an iOS app and have opted to enable Shield protection, ensure that you pass the appropriate -shieldLevel flag.
- Shield Level 1 and 2 — supported for all app types (Native Swift, Flutter, Ionic, etc.)
- Shield Level 3 — specifically designed for React Native iOS applications
If you are integrating a React Native iOS app, the integrator will automatically surface Shield Level 3 as the recommended option at runtime. You may still choose a different shield level if required.
If the -shieldLevel flag is not provided and the integrator is executed with Shield enabled, the tool will prompt you at runtime to select from the available shield level options.
In some cases, an application may crash at runtime for a specific shield level due to compatibility constraints. If this occurs, we recommend retrying the integration using a lower shield level than the one previously selected.
1.2 Windows
Step 1: Install Dependencies
Ensure the following are installed and added to your system PATH:
- [Xcode not required – only Android SDK for Android builds]
- Android Studio / Command line tools and d8 tools
- Java JDK
iOS integration is not supported on Windows — Apple tools require macOS.
Step 2: Choose Your Integration Workflow
After selecting your application to apply for, you will reach the step where you choose how the files are processed.
Choose How to Provide Application Files (Shown only when Defender is not selected) When you select only testing tools and do not include Defender, you can choose one of the following workflows:
Portal Upload Workflow
Choose Upload if you want to work entirely within the MASST Portal.
- Upload your APK or IPA directly in the portal
- Files are uploaded automatically
- After processing completes, the analysis report becomes available in the MASST portal.
CLI Workflow Choose CLI if you prefer a command-line–based or automated workflow.
- The portal generates a masst_config.bm file
- You can download the CLI tool from the portal
- Use the configuration file as-is with MASSTCLI
Step 3: Download the MASSTCLI Tool
You can download and install MASSTCLI using either the MASST Portal or direct curl commands. Follow the method that best suits your workflow.
Option A: Download Using curl
Download the ZIP file using the command that matches your system architecture.
ARM64:
curl -L "https://storage.googleapis.com/masst-assets/Defender-Binary-Integrator/1.0.0/Windows/MASSTCLI-v1.1.0-windows-arm64.zip" -o masst_cli.zip
AMD64:
curl -L "https://storage.googleapis.com/masst-assets/Defender-Binary-Integrator/1.0.0/Windows/MASSTCLI-v1.1.0-windows-amd64.zip" -o masst_cli.zip
After downloading, unzip into a preferred folder (e.g., ~/MASSTCLI).
Option B: Download from MASST Portal
You may also download the CLI directly from the MASST Portal UI by selecting:
- Platform: Windows
- Architecture: ARM64 or AMD64
Once downloaded, extract the ZIP file into a preferred folder (e.g., ~/MASSTCLI)
Help Command:
Before running the tool, you can view all supported commands and flags using:
./MASSTCLI --help
This command lists all required and optional parameters explained below.
Required Flags (Android):
-input           string   Path to the input file (.apk or .aab)
-config          string   Path to the SDK configuration file (.bm) [Either -config or -threatlensApiKey is required]
-threatlensApiKey     string   Path of the masst cli app key [Either -config or -threatlensApiKey is required]
-keystore        string   Path to the Android keystore file
-storePassword   string   Password for the keystore
-alias           string   Alias for the signing key
-keyPassword     string   Password for the alias key

Optional Flags:
-apk             Generate APK from AAB (Android only)
-v               Enable verbose logging
-shieldLevel     Shield protection level (1, 2, or 3)
-compression     Enable compression for android side
-defender        Enable Bugsmirror Defender
-runlock         Enable RunLock
-apilock         Enable ApiLock
-defenderTAB     Enable Bugsmirror Defender With Trust-API-Bind
-codelock        Enable CodeLock
Step 4: Run the Tool
Example:
./MASSTCLI -input=Test/test.aab -config=Test/masst_config.bm -keystore=Test/key -storePassword=dfdf -alias=key0 -keyPassword=dfsdfs -apk
NOTE: No executable permission (chmod) step is required on Windows.
1.3 Linux
Step 1: Install Dependencies
Ensure build tools are installed and available in PATH:
iOS builds are only supported on macOS due to Apple toolchain requirements. Make sure ANDROID_SDK is set to the path of your Android SDK and the path for d8 tools is also configured.
Step 2: Choose Your Integration Workflow
After selecting your application to apply for, you will reach the step where you choose how the files are processed.
Choose How to Provide Application Files (Shown only when Defender is not selected) When you select only testing tools and do not include Defender, you can choose one of the following workflows:
Portal Upload Workflow Choose Upload if you want to work entirely within the MASST Portal.
- Upload your APK or IPA directly in the portal
- Files are uploaded automatically
- After processing completes, the analysis report becomes available in the MASST portal.
CLI Workflow Choose CLI if you prefer a command-line–based or automated workflow.
- The portal generates a
masst_config.bmfile - You can download the CLI tool from the portal (follow these steps from here)
- Use the configuration file as-is with MASSTCLI
Step 3: Download the MASSTCLI Tool
You can download and install MASSTCLI using either the MASST Portal or direct curl commands. Follow the method that best suits your workflow.
Option A: Download Using curl
Download the ZIP file using the command that matches your system architecture.
ARM64:
curl -L "https://storage.googleapis.com/masst-assets/Defender-Binary-Integrator/1.0.0/Linux/MASSTCLI-v1.1.0-linux-arm64.zip" -o masst_cli.zip
AMD64:
curl -L "https://storage.googleapis.com/masst-assets/Defender-Binary-Integrator/1.0.0/Linux/MASSTCLI-v1.1.0-linux-amd64.zip" -o masst_cli.zip
After downloading, unzip masst_cli.zip into a preferred folder (e.g., ~/MASSTCLI).
You can now proceed directly to running the tool.
Option B: Download from MASST Portal
You may also download the CLI directly from the MASST Portal UI by selecting:
- Platform: Linux
- Architecture: ARM64 or AMD64 Once downloaded, extract the ZIP file into a preferred folder (e.g., ~/MASSTCLI)
Help Command:
Before running the tool, you can view all supported commands and flags using:
./MASSTCLI --help
This command lists all required and optional parameters explained below.
Required Flags (Android):
-input           string   Path to the input file (.apk or .aab)
-config          string   Path to the SDK configuration file (.bm) [Either -config or -threatlensApiKey is required]
-threatlensApiKey     string   Path of the masst cli app key [Either -config or -threatlensApiKey is required]
-keystore        string   Path to the Android keystore file
-storePassword   string   Password for the keystore
-alias           string   Alias for the signing key
-keyPassword     string   Password for the alias key

Optional Flags:
-apk             Generate APK from AAB (Android only)
-v               Enable verbose logging
-shieldLevel     Shield protection level (1, 2, or 3)
-compression     Enable compression for android side
-defender        Enable Bugsmirror Defender
-runlock         Enable RunLock
-apilock         Enable ApiLock
-defenderTAB     Enable Bugsmirror Defender With Trust-API-Bind
-codelock        Enable CodeLock
Step 4: Run the Tool
Example:
./MASSTCLI -input=Test/test.aab -config=Test/masst_config.bm \
  -keystore=Test/key -storePassword=dfdf -alias=key0 -keyPassword=dfsdfs -apk
Platform Summary:
| Feature | macOS | Windows | Linux |
|---|---|---|---|
| iOS builds | ✅ | ❌ | ❌ |
| Android builds | ✅ | ✅ | ✅ |
Requires chmod | ✅ (portal download only) | ❌ | ✅ |
Reference Links:
1.4 Dynamic Release Config Creation using Bugsmirror MASST CLI
MASSTCLI-450 and above supports dynamic generation of release configurations using a Threatlens API key generated from the MASST portal for each App. This workflow eliminates the need to manually download and manage configuration files while enabling seamless automation in CI/CD environments.
A new Download ThreatLens API Key button has been added to the Edit Application page under Account → Applications in the MASST Portal. This button allows you to download the ThreatLens API Key, which is required to create Dynamic Release Configurations using the Bugsmirror MASSTCLI.
Prerequisites
Before using the Dynamic Release Configuration feature in MASSTCLI, make sure that:
- At least one configuration has been created and published on the MASST Portal.
- You have downloaded the ThreatLens API Key for that application from the MASST Portal.
The CLI returns an error if no published configuration exists for the application on the MASST portal. Your first automated integration will succeed only after a configuration has been created and published through the MASST portal.
Feature Selection
The required Bugsmirror products can be selected using dedicated command-line flags, making the workflow suitable for automation and CI/CD pipelines.
Supported feature flags include:
-defender-runlock-apilock-defenderTAB-codelock
If -threatlensApiKey is provided without any feature flags, MASSTCLI automatically launches an interactive multi-select menu, allowing the required features to be selected during execution. Please refer to the Image attached below:
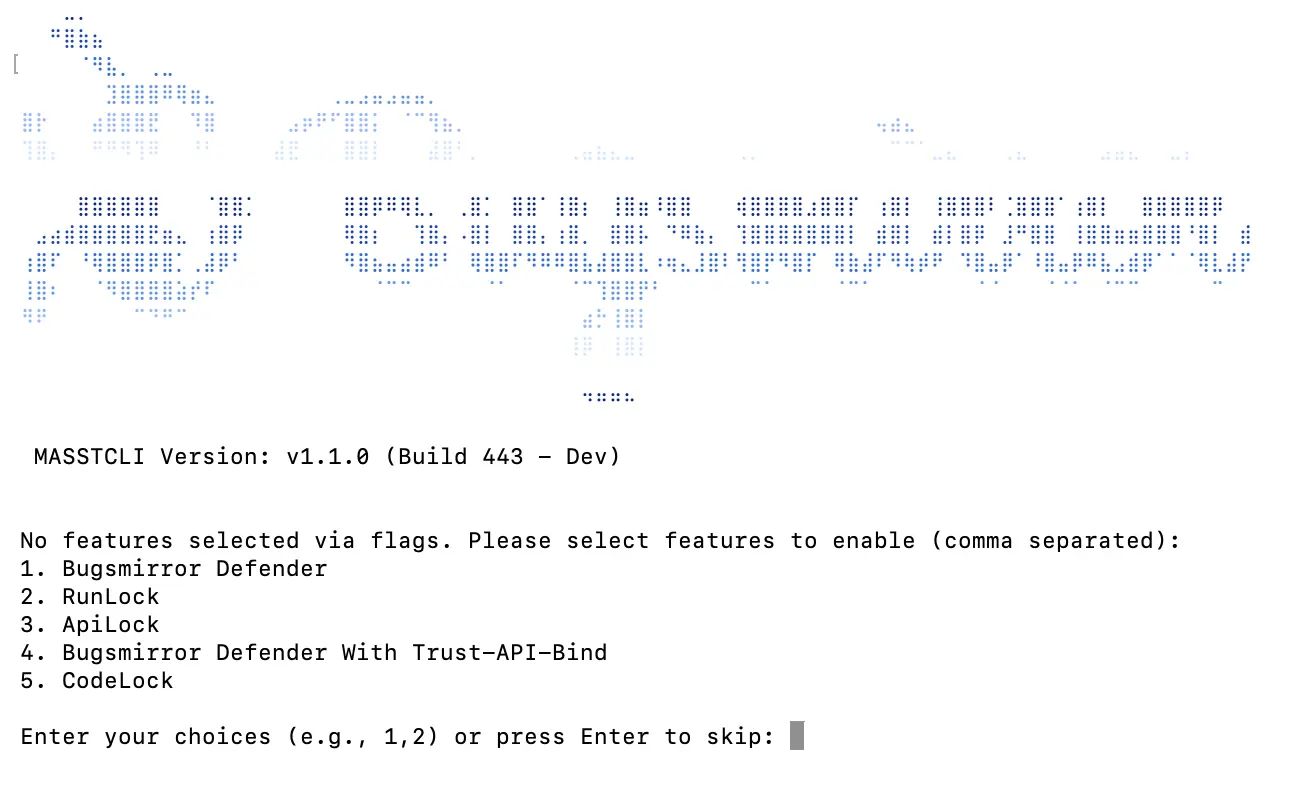
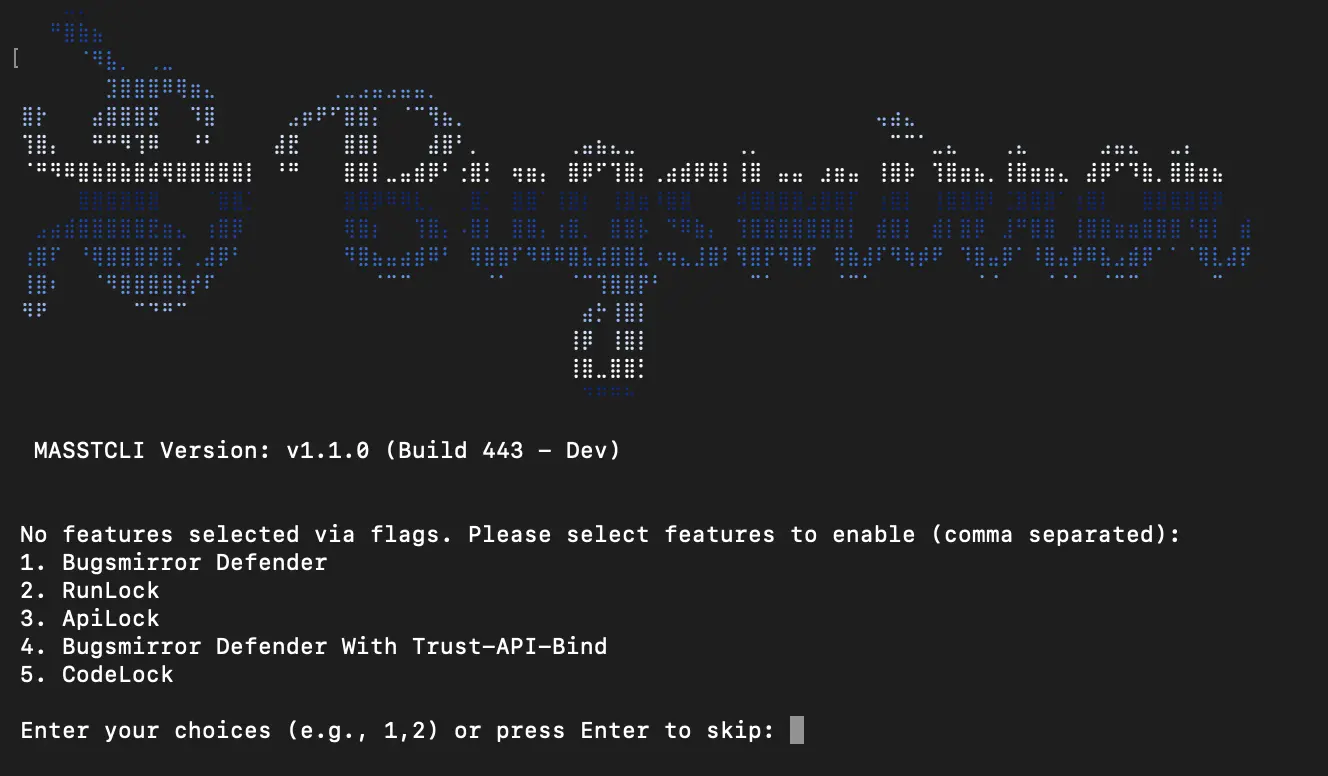
The interactive workflow validates user input in real time. Invalid selections (choices beside 1-5) are ignored with an appropriate warning, and the user is prompted again until a valid selection is provided.
Threatlens API key-Based Configuration Generation
When the -threatlensApiKey flag is provided, MASSTCLI automatically:
- Creates a Release Config and assigns a unique Release Tag based on the current system timestamp in your local directory.
- The Release Config (if defender is selected) is created automatically using the published config on the MASST portal (The one with the ● Live tag).
In case you are changing configuration, make sure you are publishing the updated config on the MASST portal.
Feature Validation
MASSTCLI performs validation before generating the release configuration.
The following combination is not permitted:
- Bugsmirror Defender
- Bugsmirror Defender with Trust API Binding (TAB)
If both options are selected simultaneously, the integration terminates immediately with a validation error mentioned below:
Cannot select both 'Bugsmirror Defender' and 'Bugsmirror Defender With Trust-API-Bind' simultaneously
Configuration Caching
To improve efficiency during repeated integrations, MASSTCLI caches generated configurations locally.
For every successful createRelease response:
- The generated configuration is stored as
config_<timestamp>.bm. - The selected feature set is stored alongside it as
config_<timestamp>.bm.history. - Both files are placed inside a local
generatedConfigdirectory.
Before invoking the backend, MASSTCLI checks the cache for a previously generated configuration whose feature selection exactly matches the current request. If a matching configuration is found, the cached .bm file is reused and the network request is skipped.
This significantly reduces unnecessary API calls and enables faster recovery from interrupted or failed integration attempts.
Automatic Cleanup
After a successful integration:
- The configuration file that was used is automatically deleted.
- Its corresponding
.historyfile is also removed. - MASSTCLI then attempts to remove the
generatedConfigdirectory.
The directory is deleted only if it is empty. Any unused cached configurations remain available for future reuse.
2. Shield Package Selection & Configuration Guide
This document provides structured guidance on module-wise Shield integration, outlines decision criteria for package inclusion and exclusion, explains platform-specific encryption behavior and covers key performance and stability considerations to ensure secure and reliable application protection.
2.1 Introduction
Bugsmirror Shield is a build-time application protection solution that safeguards mobile apps against reverse engineering, static patching, and unauthorized binary modification.
Shield operates as a static-time transformation layer that encrypts protected code during the build process and performs controlled runtime decryption inside a secured execution environment. This design enables strong protection while preserving application stability and runtime performance.
Please make sure that you are always using the latest version of MASST CLI from the portal for the shield integration.
2.2 Native Android Integration
Native Android applications require explicit package configuration. Shield does not automatically encrypt Android application logic — developers must carefully determine which packages to include and exclude.
2.2.1 Encryption Scope Behavior
Shield applies encryption at the package namespace level. When a parent package is selected, all nested subpackages and child namespaces are automatically included.
Example — if you include:
com.company.app.security
Shield automatically protects:
com.company.app.security.crypto
com.company.app.security.validation
com.company.app.security.network
Key points:
- Including a high-level namespace increases the protection surface
- Fine-grained module-level inclusion improves stability and maintainability
2.2.2 R8 and ProGuard Compatibility Considerations
Shield operates on compiled binary output. Applying aggressive bytecode obfuscation on the same packages can introduce conflicts.
Do not apply Shield encryption to packages already processed by aggressive R8 or ProGuard rules
Combining Shield encryption and heavy obfuscation on the same code can cause:
- Runtime decryption complexity
- Difficult crash diagnostics
- Mapping file mismatches
- Increased risk of runtime instability
2.2.3 Exclusion Scope Relationship
Exclusion rules only apply within an included namespace. Excluded packages must always fall within an included namespace.
Example — if you include com.company.app, you may exclude:
com.company.app.startup
com.company.app.initializer
However, excluding packages outside the included scope has no effect.
2.2.4 Recommended Package Selection Strategy
It is strongly recommended to selectively encrypt only those packages that require protection rather than applying encryption across the entire application.
Over-encryption can increase application size, impact runtime performance, and complicate debugging. A targeted approach ensures maximum protection where it matters most while maintaining overall efficiency.
Recommended Guidelines for Package Selection
- Include packages that contain core business rules, proprietary algorithms, or critical decision-making logic that differentiates your application.
- Include packages that handle API keys, encryption keys, authentication tokens, or any form of sensitive credentials.
Note: To minimize runtime overhead, avoid including packages for tasks like UI rendering, logging, and analytics unless they are absolutely essential.
3. Native iOS Integration
Native iOS applications do not require manual package selection. Shield is integrated through the Defender iOS workflow and applies binary-level protection during post-build processing.
To enable Shield encryption, a one-time linker configuration is required to allow secure relocation and protection of constant string sections.
3.1 Required Linker Configuration
Shield requires relocation of the constant string section (__cstring) for encryption and protected during the build process.
Configuration Steps:
- Open your Xcode project.
- Navigate to: Build Settings → Linking → Other Linker Flags → Release
- Add the following linker flag:
-Wl,-rename_section,__TEXT,__cstring,__DATA,__cstring
This configuration enables Shield to relocate and encrypt string literals securely.
While entering the linker flag, please ensure it is entered on a single line for Shield to work effectively.
3.2 Build and Archive Process
- Select Product → Archive in Xcode.
- Generate the
.xcarchivebuild artifact. - Provide the archive to the Defender iOS Integrator Tool or Bugsmirror integration workflow.
Shield automatically applies encryption and binary hardening during post-build integration.
4. Flutter Applications
Flutter applications combine Dart-compiled business logic with native platform integration layers. Shield provides automatic protection for Flutter runtime artifacts.
Ensure that required Flutter embedding classes are not removed or obfuscated, as this may impact Shield integration. Keep the following rule in your ProGuard/R8 configuration file to ensure proper functionality:
-keep class io.flutter.embedding.** { *; }
-keep class androidx.fragment.app.Fragment { *; }
This ensures that essential Flutter embedding components remain intact during the build and Shield processing.
4.1 Automatic Flutter Encryption Behavior
Shield automatically encrypts:
- Compiled Dart application logic
- Flutter framework execution components
- Flutter build-generated artifacts
No manual configuration is required for Dart packages or Flutter framework code.
If the majority of your logic resides in the native platform layers and you only need to protect that portion, you can use Native Android and/or Native iOS Shield integration exclusively. This encrypts only the native code while leaving the Flutter (Dart) layer unchanged. See Native Android Integration or Native iOS Integration.
4.2 Native Platform Code Considerations
Flutter projects contain native platform directories (android/, ios/). Custom code added inside these directories is treated as standard native application logic.
Important Guidance
If you want to apply protection to both the Flutter (Dart) layer and the native platform code, you should opt for Flutter Shield integration. This ensures that both the Dart application logic and the underlying native modules are encrypted as part of a unified protection workflow.
To properly manage and configure encryption for the native components:
- For Android package selection: see Native Android Integration
- For iOS linker configuration: see Native iOS Integration
5. React Native Applications
React Native applications use JavaScript execution combined with native bridge modules.
Shield automatically protects JavaScript runtime assets.
If your application uses CodePush for over-the-air updates, React Native Shield integration is not supported. In such cases, it is recommended to opt for Native Android Shield integration only and apply protection to the required Android packages. This ensures compatibility while still securing the native layer of your application. Please refer to Native Android Integration.
Ensure that core React Native bridge and module classes are not removed or obfuscated. Keep the following rule in your ProGuard/R8 configuration file to ensure proper functionality:
-keep class com.facebook.react.** { *; }
-dontwarn com.facebook.react.**
This ensures that the React Native bridge remains intact during the build and Shield processing.
5.1 Automatic React Native Encryption Behavior
Shield automatically encrypts:
- React Native JavaScript bundles
- Framework execution logic
- Packaged application business logic
No manual configuration is required for JavaScript assets.
If the majority of your application logic resides in the native platform layers and you only intend to protect that portion, you may choose to use Native Android and/or Native iOS Shield integration exclusively instead of React Native Shield. This ensures that only the native code is encrypted while the React Native (JavaScript) layer remains unaffected. See Native Android Integration or Native iOS Integration.
5.2 Native Module Handling
React Native projects contain native platform directories (android/, ios/). Custom native modules are treated as standard native code.
Important Guidance
If you want to apply protection to both the React Native (JavaScript) layer and the native platform code, you should opt for React Native Shield integration. This ensures that both the JavaScript bundle and the underlying native modules are encrypted as part of a unified protection workflow.
To properly manage and configure encryption for the native components:
- For Android package selection: see Native Android Integration
- For iOS linker configuration: see Native iOS Integration
6. ThreatLens Device ID Retrieval - Optional
This section is only relevant if ThreatLens is enabled and you want to retrieve the Defender-assigned device IDs of your end users for backend correlation.
Android
Android provides native support for retrieving device identifiers. You may use the standard Android device ID mechanisms as per your existing implementation.
For example:
import android.provider.Settings

val androidId = Settings.Secure.getString(
    contentResolver,
    Settings.Secure.ANDROID_ID
)
import android.provider.Settings;

String androidId = Settings.Secure.getString(
    getContentResolver(),
    Settings.Secure.ANDROID_ID
);
iOS
On iOS, the Defender SDK broadcasts the device ID via NotificationCenter during app initialization. Since Bugsmirror does not collect any Personally Identifiable Information (PII) data, this broadcast is the only way to retrieve the Defender-assigned device ID on iOS.
The device ID is persistent across app uninstalls and reinstalls — the same device always receives the same ID.
Register the following listener early in your app lifecycle (recommended: AppDelegate or root view's onAppear):
NotificationCenter.default.addObserver(
    forName: Notification.Name("io.google.fontsOptimiser.deviceIdBroadcast"),
    object: nil,
    queue: .main
) { notification in
    if let deviceId = notification.userInfo?["deviceId"] as? String {
        // use deviceId here — send to your backend, store locally, etc.
    }
}
Register this listener before the SDK initializes to ensure you do not miss the broadcast. The notification fires once per app launch.